


Thanks to Steve Vachon from BEBG Greenhouses for sharing his secrets with us! We now offer sprouting seeds online!
Here are two explanatory videos:
It's relatively easy to make. It's quick. It's great for families whose kids don't like to eat vegetables because it's always more motivating to eat something you've grown yourself. And it's packed with vitamins! A single stalk of microgreens is packed with nutrients.
Just as an example, sunflower microgreens are the microgreens with the highest protein content. They are the most complete plant-based protein with 23% protein per serving. And 1 oz of broccoli microgreens contains the nutrient equivalent of 1 to 1.5 lbs of broccoli stalks.
All the same nutrients found in a mature vegetable will be found in the microgreen, or even more so since it is still growing. The nutrients are therefore much more concentrated in a microgreen.
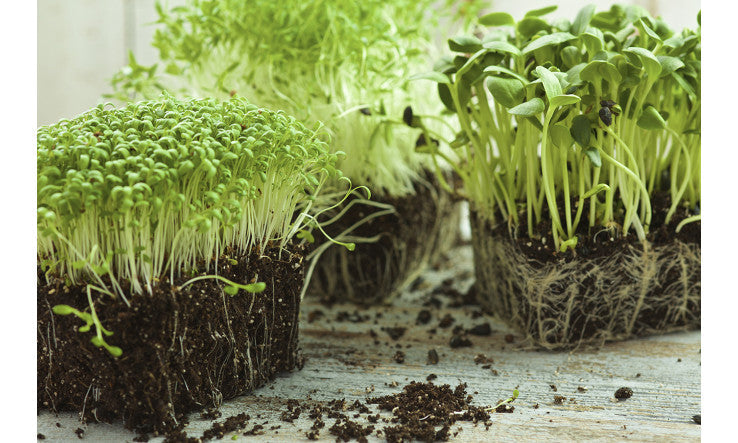
Steps to grow your microgreens:
- Fill your containers with very moist soil and do not compact the soil.
- Spread the seeds on the surface. We want them to be close together to cover the container well (from 1 tsp to 1 tbsp depending on the size of the seeds)
- Cover any seeds that need to be covered with a thin layer of soil. Steve's rule of thumb: Anything the size of a radish seed and smaller (red cabbage, lettuce, broccoli) should simply be placed on top. Anything larger, or with a scale (wheatgrass, sunflower, peas), should be covered with soil.
- We spray our shoots every day and create a greenhouse effect by installing a cover or a bell on our container.
Within 3-4 days, your sprouts will be ready to eat. And if you produce more sprouts than you can eat, simply refrigerate them. They will go dormant and stop growing, but their nutrient content will not be affected.


Leave a comment